How to Fix Ubuntu Ping Not Found Error
Ping is a quick and easy way to check if a network device is reachable. If you’re seeing Ubuntu ping not found errors, follow this guide to fix the problem.
Ping is a simple but useful utility that can help you quickly identify network issues. If you’re suffering from high ping, for example, then it can cause issues when streaming media or gaming.
The ping utility is usually installed with your OS, but there are times when this may not happen, or the utility may get removed. If this is the case on Ubuntu, you’ll see an Ubuntu ping not found error message. You won’t be able to use ping until you fix it.
Thankfully, you should be able to get ping up and running in a matter of moments. Here’s what to do if ping isn’t found on Ubuntu.
What is Ping?
Ping is a simple utility that allows you to test the responsiveness of network devices. It works by sending a small packet of data to the target IP address or device. If the device is reachable, it will send back a small data packet in response.
Receiving this response allows you to confirm that the device is reachable on the network. You can also see how long the round trip took, and whether there was any packet loss, which can indicate poor network connectivity.
The name comes from the use of sonar, in which the sonar system sends out a sound wave to locate an object. When that sound wave hits an object, it reflects back. The received sound wave is called a ping, due to the sound that the sonar operators hear.
An acronym has been shoehorned onto this name: Packet Inter-Network Groper.
How to Use Ping
The simplest way to use ping is to enter the command followed by a hostname or IP address.
To use ping on Ubuntu:
- Open the Terminal app.
- Type the following command, and press Enter:
ping [hostname or IP address]
- For example, to ping the IP address 192.168.1.100, type the following and press Enter:
ping 192.168.1.100
- You should see a continually refreshing list of responses from the IP address you entered.

- To stop ping running, press Ctrl+C.
- Once the process stops, you’ll see information about the number of packets sent, the number of packets received, the percentage of packets lost, and the total time taken.

- Beneath that, you’ll see the minimum, mean average, maximum, and standard deviation of all the ping round trip times (rtt).

How to Use Ping Options
If you want a little more control over ping, you can use options settings to make changes to how the utility behaves.
You can limit how many packets are sent, change the size of the packets, or even have your computer beep when a packet is received if you really want to feel like you’re on a submarine.
You can use an option by entering the appropriate letter directly after the ping command, following by any required parameters, and finally the hostname or IP address.
Here are some of the more useful ping options:
- -c: Limits the number of times packets are sent
ping -c 10 192.168.1.100
- -w: Sets the number of seconds after which ping will stop
ping -w 30 192.168.1.100
- -i: Sets the interval in seconds between each packet transmission (default is 1)
ping -i 5 192.168.1.100
- -s: Sets the packet size to send (default is 64)
ping -s 100 192.168.1.100
- –a: Plays an audible ping when the packet is returned
ping -a 192.168.1.100
How to Fix Ubuntu Ping Not Found Errors
If you receive a ping not found error, the most common reason is that the utility isn’t installed. Some versions of Ubuntu are very minimal and made not include the ping utility in the original install.
You’ll need to manually install the ping utility in order to be able to use it.
To fix Ubuntu ping not found errors:
- Open the Terminal app.
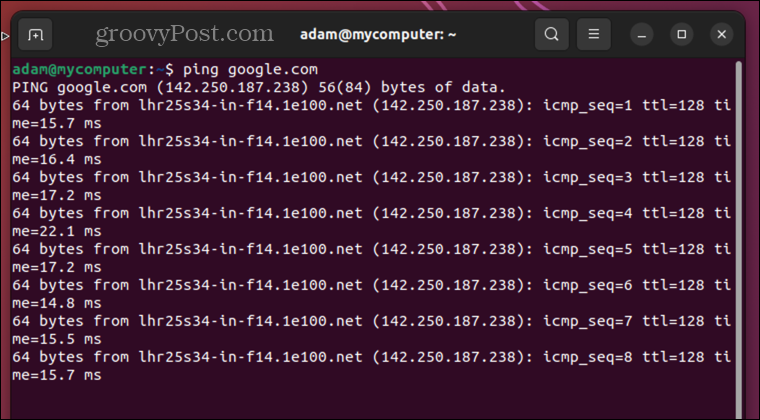
- Try a ping command like ping google.com to test if ping is found.
- If ping works, press Ctrl+C to stop the process.
- If it’s not found, you’ll see an error message.

- To install the ping utility, enter the following command, and press Enter:
sudo apt install iputils-ping
- The ping utility should start to install.

- When the process is complete, try ping google.com again.
- You should find that the utility is now working.

- Press Ctrl+C to stop ping running. You can now use ping however you wish.
Keep Ubuntu Running Smoothly
Hopefully the steps above will solve your Ubuntu ping not found problems, and you’ll have ping up and running in no time.
If you’re an Ubuntu user, there are plenty of other useful tips and tricks to help you fix common problems. If you can’t use Ping because you’re having problems opening Terminal in Ubuntu, there are some fixes you can try.
And if an upgrade is causing problems, you can learn how to downgrade the kernel on Ubuntu.


