How to Fix Dual Boot Option Not Showing In Windows
Windows is still by far the most popular desktop operating system in the world. There are times, however, when you might want to use an earlier version of Windows, or even a different OS altogether, such as Linux. Thankfully, it’s easy to use multiple operating systems on the same computer using dual booting.
Dual booting lets you choose which operating system loads when you start up your computer. You’ll see a list of the available operating systems and can choose which one loads. If you don’t make a choice, the default option will load after a set period of time.
Sometimes, however, you may find that the dual boot menu doesn’t appear, and you boot directly into the default OS. Here are some things you can try if you’re having problems with the dual boot option not showing in Windows.
1. Turn on the Boot Menu Using the Command Prompt
One reason that you don’t see the dual boot option is because the boot menu has been deactivated. You can turn this back on using the Boot Configuration Data utility in the command prompt.
You can also use Windows PowerShell or the newer Windows Terminal apps to complete this step.
To enable the boot menu in the Command Prompt:
- Click the Search icon in the taskbar.

- Type cmd then right-click the Command Prompt app and select Run as Administrator.

- Type bcdedit /set {bootmgr} displaybootmenu yes and press Enter.
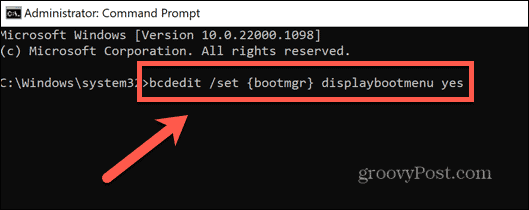
- If you’ve entered the command correctly, you should see a message informing you that the operation was completed successfully.
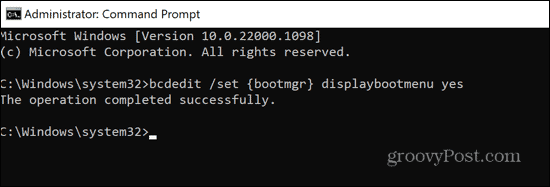
- Restart your computer and see if the dual boot option has returned.
2. Use EasyBCD to Configure Boot Settings
If the bcdedit command didn’t work, you can try using an app that allows you to configure the Boot Configuration Data. You can try using this app to ensure that the boot menu is set up to work as you would wish. EasyBCD is free for personal use, although you’ll need to provide a name and email to access the download.
To configure boot settings using EasyBCD:
- Download and install EasyBCD.
- Launch the app.
- Click Edit Boot Menu.
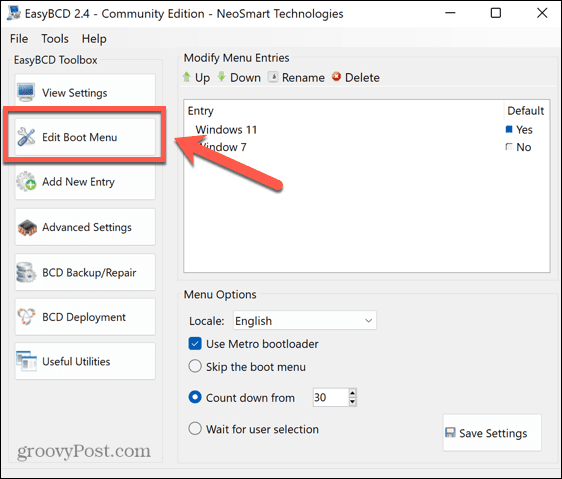
- You should see your dual boot options listed here. You can change the order and select the default option.

- If one is missing, click Add New Entry to add it back in.
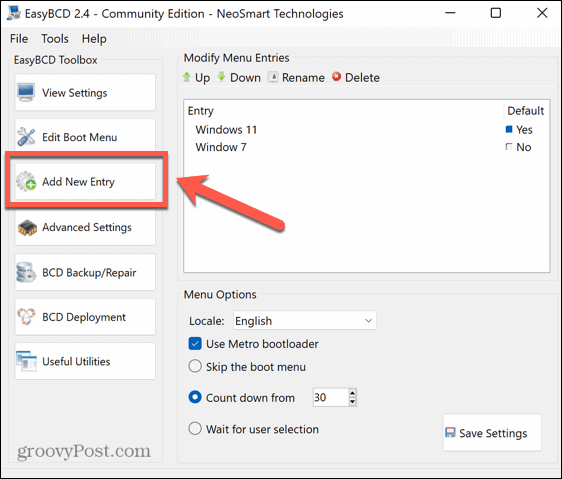
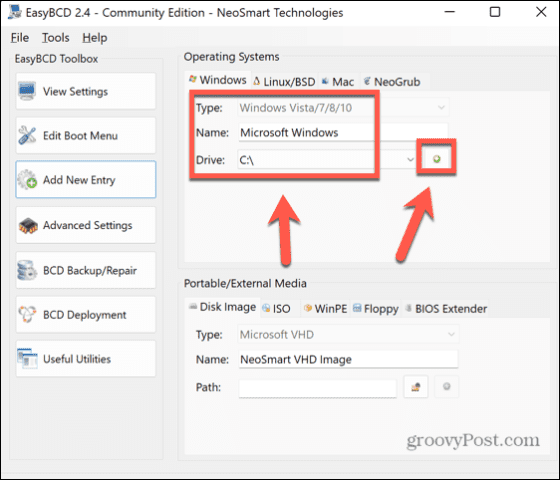
- Select the type of operating system, give it a name, select the drive where the operating system is installed, and then click the Add Entry icon.
- Click Edit Boot Menu.

- Check the Use Metro Bootloader checkbox and select how long you want to be given to select the operating system to boot.

- Click Save Settings.
- Restart your computer, and you should see your dual boot options.
3. Configure System Startup Settings
One issue that may lead to the dual boot option not showing in Windows is that the system boots up before you’ve had a chance to make your selection. You can set the amount of time that the dual boot menu shows before the default OS loads in the advanced system startup settings.
To configure system startup settings:
- Click the Search icon in the taskbar.

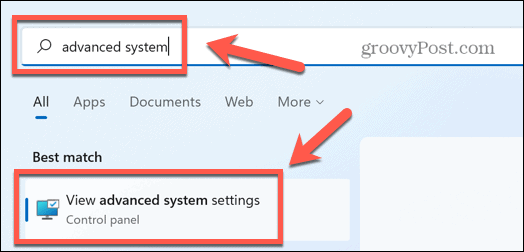
- Start typing Advanced System Settings and click on View Advanced System Settings when it appears.
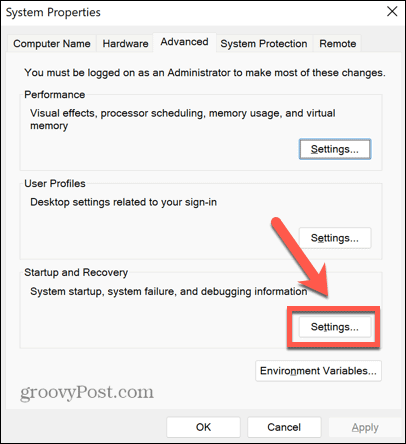
- Under Startup and Recovery click Settings.
- Ensure that Time To Display List Of Operating Systems is checked and set a reasonable amount of time for this list to display, such as 30 seconds.
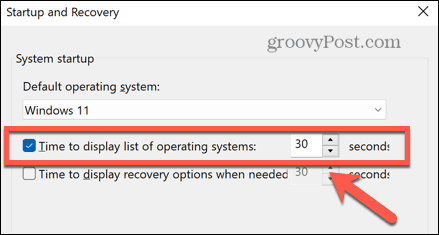
- Click OK to save any changes.
- Restart your computer and see if the dual boot option shows.
4. Use the System Configuration Tool to Set Boot Options
Another way to ensure there is adequate time to make your selection in the dual boot menu is to use the System Configuration utility.
To set boot options using the System Configuration tool:
- Click the Search icon in the taskbar.

- Start typing System Configuration and double-click the System Configuration app when it appears.
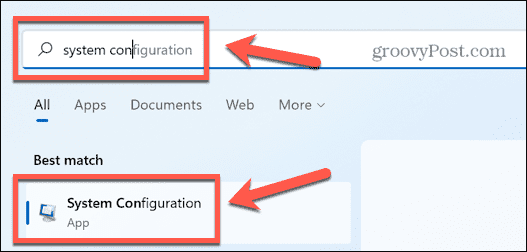
- Click the Boot tab.

- Set the Timeout to a reasonable amount of time, such as 30 seconds.
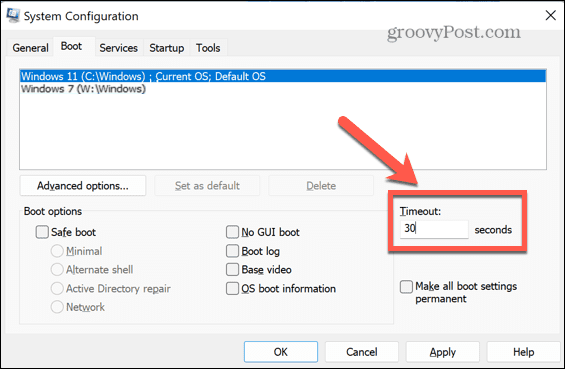
- Click Apply and restart your computer to see if the dual boot options appear.
5. Disable Windows Fast Startup
Another possible reason that you may not be seeing the dual boot menu is that you have Windows Fast Startup turned on. In this mode, when you turn off your computer, it logs out of your user account and then saves the state of the operating system to a hibernation file. When you reboot, instead of loading all the drivers and the current system state again, it just places the image from the hibernation file back into RAM, which speeds up the startup process.
This setting is usually enabled by default, but since Windows doesn’t perform a full shutdown, it may stop the dual boot menu from loading. Disabling Fast Startup may fix this problem.
To disable Windows Fast Startup:
- Click the Search icon in the taskbar.

- Start typing Control Panel and double-click the Control Panel app when it appears.
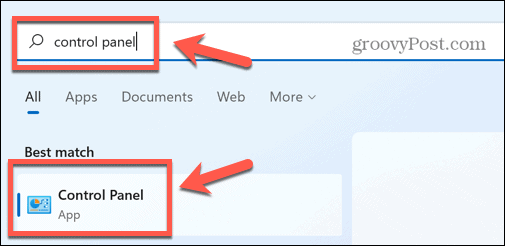
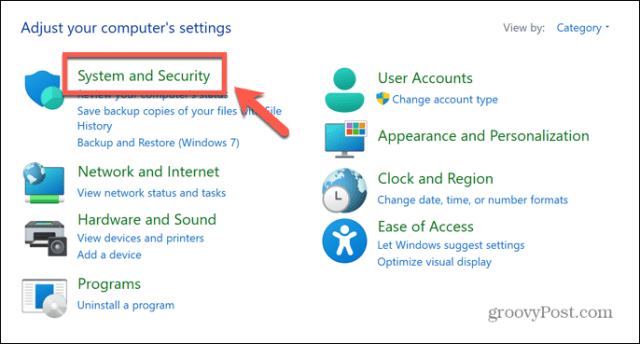
- Click System and Security.
- Select Power Options.

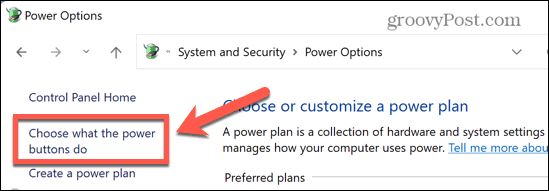
- In the left-hand menu, click Choose What The Power Buttons Do.
- Click Change Settings That Are Currently Available.

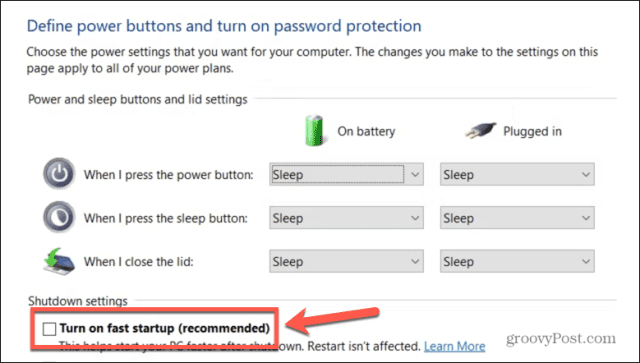
- Under Shutdown Settings make sure that Turn On Fast Startup is unchecked.
- Click Save.
- Restart your computer to see if the dual boot menu returns.
Troubleshooting Windows
If you’ve been having issues with the dual boot option not showing in Windows, hopefully one of the fixes above has helped. If you find any other useful solutions, then please let us know in the comments below.
Dual boot problems aren’t the only issues that can occur on Windows. If you’re seeing the ERR_CONNECTION_TIMED_OUT error, then there are some fixes you can try. If it’s the Code 43 error that’s causing you grief, there are a few tweaks you can try to solve the problem.
There are also some steps you can take if Snip and Sketch isn’t working on Windows.


