
How to Disable or Enable Touchscreen in Windows 11
If you don’t use the touchscreen on your laptop or convertible PC, you can safely disable it in Windows 11 or re-enable it quickly afterward. Here’s how.
The laptop market isn’t the same as it used to be. With laptops containing touchscreens becoming more and more common, you may find yourself touching the screen to perform actions, rather than using your touchpad.
Unfortunately, touchscreens on laptops aren’t perfect. They soon start to collect nasty fingerprints, smudges, and other forms of dirt. You may prefer to keep your hands off your screen if that’s the case, you’ll be better off disabling your touchscreen entirely.
Best Ways to Disable / Enable Touchscreen in Windows 11
If you prefer to use a mouse or touchpad, you can disable the touchscreen on a Windows 11 PC using the Device Manager or by using the command line.
Disable Touchscreen from Device Manager in Windows 11
To disable the touchscreen in Windows 11 using Device Manager, follow these steps:
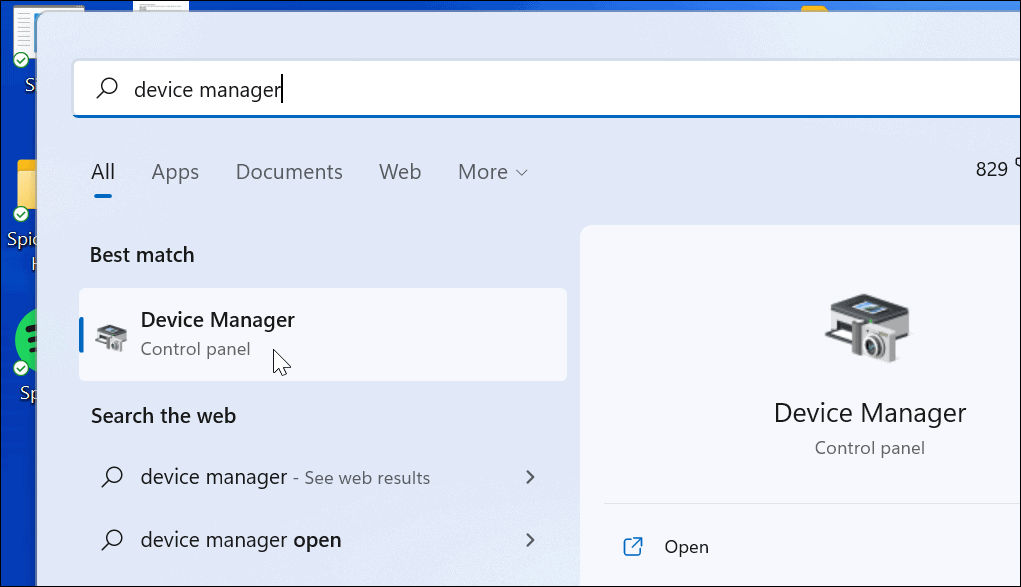
- Click the Start button or press the Windows key to open the Start menu.
- In the Start menu, type device manager, then select the Best match result.
- When Device Manager window opens, expand the Human Interface Devices section.
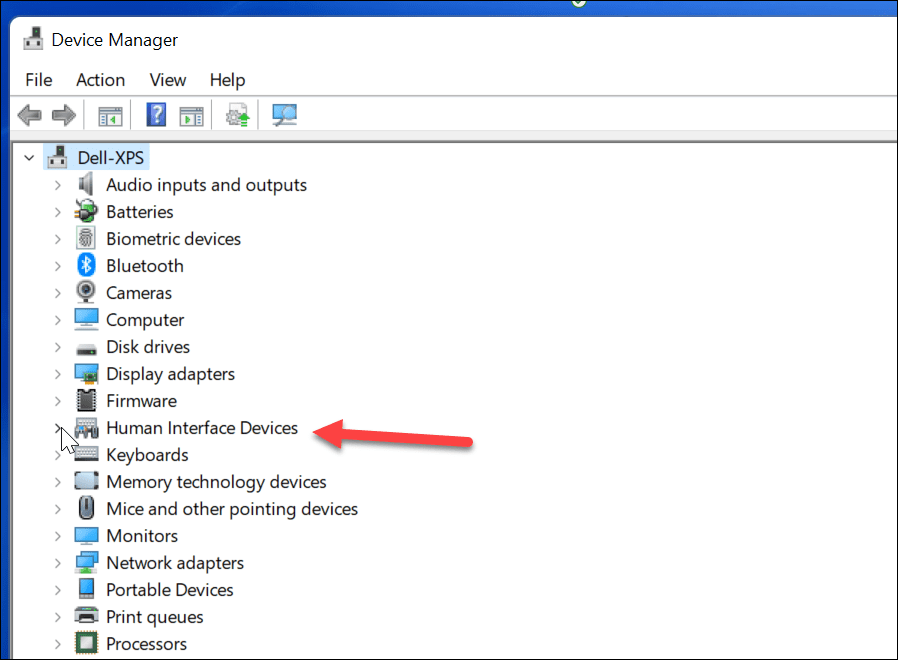
- Next, find HID-compliant touch screen from the list.
- Right-click and select Disable device from the pop-up menu.
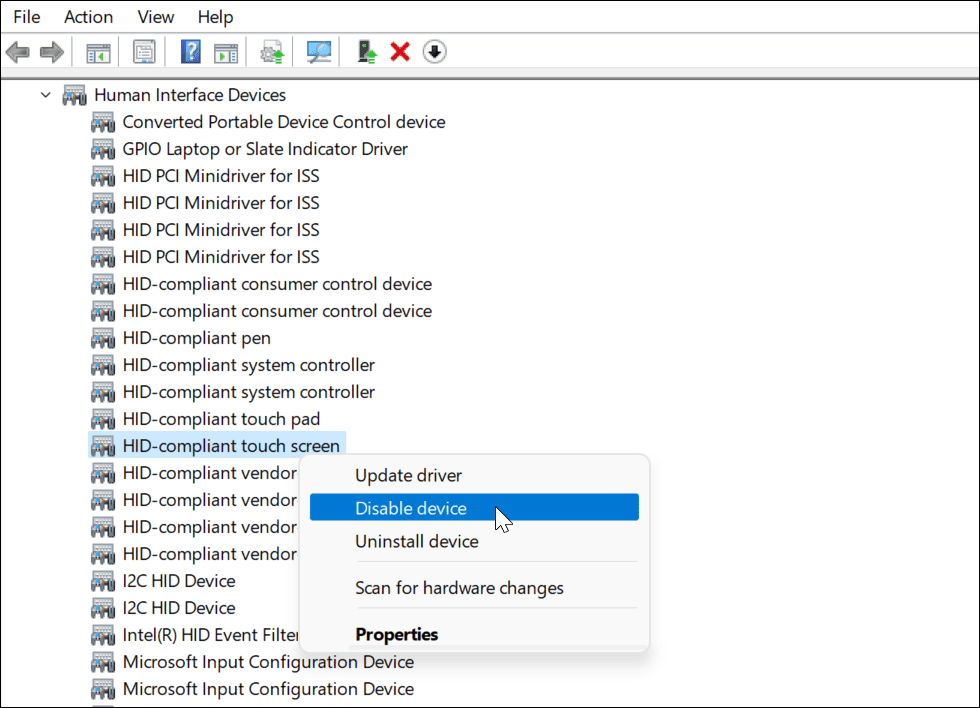
- When the verification dialogue box comes up, click the Yes button.

At this point, your touchscreen is disabled no restart is required.
Enable Touchscreen From Device Manager in Windows 11
If you want to re-enable the touchscreen on a Windows 11 PC in the future, follow these steps:
- Open Device Manager from the Start menu.
- In Device Manager, open the Human Interface Devices tree.
- Scroll down and right-click HID-compliant touch screen.
- Select Enable device from the menu.

You should be able to resume using your touchscreen at this point. If you can’t, restart your PC to ensure any underlying changes have taken effect.
Disable Touchscreen Using Windows Terminal in Windows 11
You can also use the new Windows Terminal app to disable or enable the touchscreen in Windows 11. You can also use Windows PowerShell for this, but you won’t be able to use the much older Command Line tool.
To do this:
- First, right-click the Start button or use the keyboard shortcut Windows key + X.
- From the pop-up, select Windows Terminal (Admin).

- When the terminal opens, run the following command:
Get-PnpDevice | Where-Object {$_.FriendlyName -like '*touch screen*'} | Disable-PnpDevice -Confirm:$false
After running the above command, the touchscreen will be disabled. No restart is required.
Enable Touchscreen Using Windows Terminal in Windows 11
If you disable the touchscreen using Windows Terminal, you might want to turn it back on later. Of course, you can always go into Device Manager to reenable it or use the Terminal app to restore functionality.
To enable a touchscreen in Windows 11 using the Windows Terminal app:
- Hit Windows key + X on the keyboard and select Windows Terminal (Admin) from the menu.
- When the terminal opens, run the following command:
Get-PnpDevice | Where-Object {$_.FriendlyName -like '*touch screen*'} | Enable-PnpDevice -Confirm:$false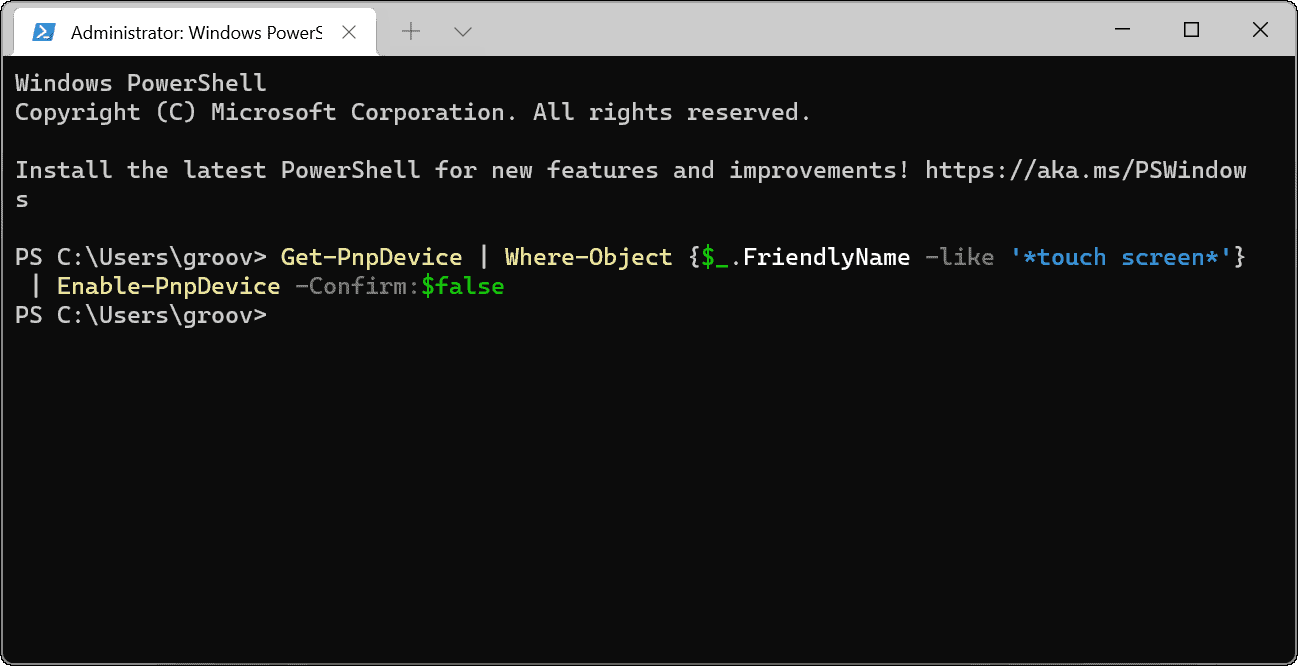
Windows 11 Input Devices
The steps above should help you to quickly enable or disable a touchscreen in Windows 11. If you’re having trouble enabling your touchscreen, don’t forget to quickly restart your PC and check for new updates.
If you rarely use the touchscreen, you can disable it safely, but it will leave you reliant on your keyboard and mouse. If these stop working, you may need to fix a Windows 11 keyboard using some common troubleshooting steps.