How to Change DNS Server On Windows 11
Domain Name System or DNS is a database consisting of different domain names and IP Addresses. Whenever a user enters a Domain in the web browser, the DNS server looks at the IP Address that the domains are associated with.
After matching the IP Address, it comments on the web server of the visiting site. Most users rely on the default DNS server provided by the ISP. However, the DNS server assigned by ISP is usually unstable and triggers connectivity errors.
So, it’s always best to use a different DNS server. As of now, there are hundreds of public DNS servers available for PC. Public DNS servers like Google DNS, OpenDNS, etc., provide better speed, better security, and ad-blocking features.
Steps to Change DNS Server On Windows 11
It’s pretty easy to change DNS in Windows 10, but settings have changed on Windows 11. So, if you are using Windows 11 and don’t know how to change the DNS server, you are reading the right article.
In this article, we will share a detailed guide on how to change the DNS server on Windows 11. Let’s check out.
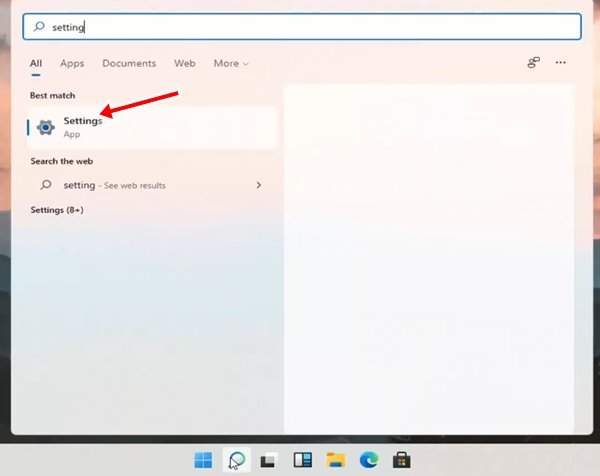
Step 1. First of all, click on the Windows 11 Start menu and select ‘Settings.’

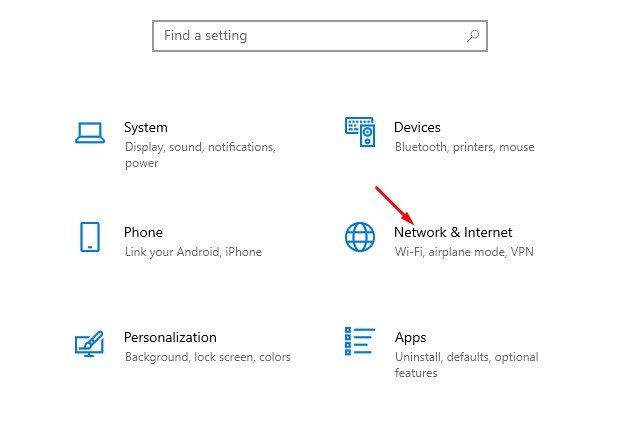
Step 2. On the Settings page, click on the ‘Network & Internet option.

Step 3. On the Network & Internet page, scroll down and click on the ‘Change Adapter options’

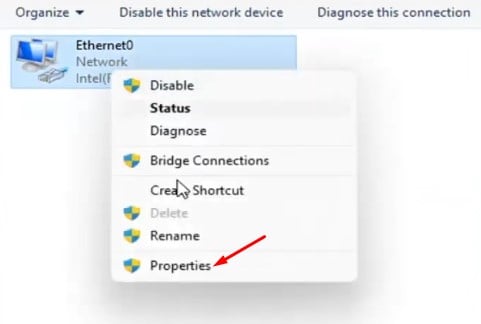
Step 4. Right-click on the Connected network and select ‘Properties.’

Step 5. On the next Window, double click on the ‘Internet Protocol Version 4.’

Step 6. On the next Window, enable the ‘Use the following DNS server addresses. Next, fill in the DNS servers and click on the ‘Ok’ button.

That’s it! You are done. This is how you can change DNS Server on Windows 11 computer.
So, this guide is all about how to change the DNS server on Windows 11 computer. I hope this article helped you! Please share it with your friends also. If you have any doubts related to this, let us know in the comment box below.


Comments are closed.