How to Install Android Studio and SDK Tools in Windows 10
The Android SDK (Software Development Kit) is a large and powerful tool that’s essential if you’re looking to get into Android app development. It serves a number of other purposes, too, such as using the command line to sideload apps onto your Android phone.
There are quite a few details and things to consider when installing the Android SDK on your PC. The following guide should help you wade through the process.
Install Latest Version of Java
If you don’t want to use Android Studio and just want the Android SDK command line version, then you’ll need to first download and install Java.
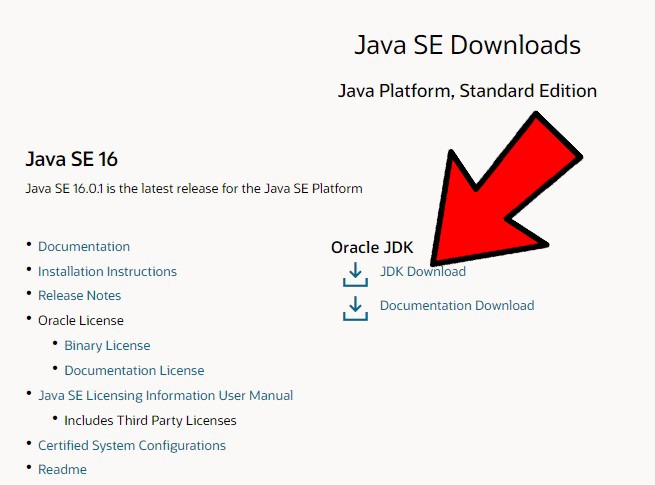
Once you click the link, click “JDK Download,” then scroll down and download “Windows x64 Installer.”
Once you’ve downloaded Java, install it, then navigate to its director (C:Program FilesJavajdk-version.number by default) and right-click the “bin..”
Next, click the Start menu, type “environment” and open “Edit the system environment variables.”

In the new window, click “Environment variables.” In the new window after that, click “Path -> Edit.”

In the “Edit environment variable” window, click “New” and enter the path of the “bin” folder in your Java directory (C:Program FilesJavajdk-16.0.1bin by default), then click OK.

Install SDK Command Line
Android Studio is a space-consuming app, and while we think its UI makes it a very accessible way of managing your development tools and packages, some people prefer the command-line route. On the Android Studio download page, pick one of the options under “Command line tools only.”

Download it and install it to the “Android” folder on your hard drive.
In the folder, go to “tools/bin,” then right-click “sdkmanager” and run as administrator.
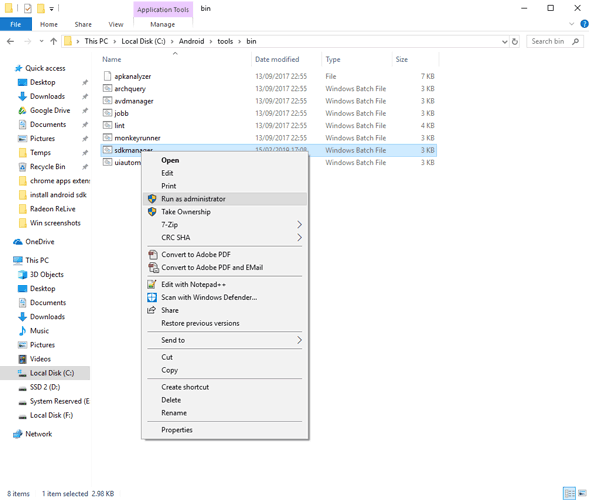
This should install the basic packages and leave you with a command line prompt where you can enter various commands to manage your SDK tools.
For us, a good place to start is to get the platform tools by typing:
sdkmanager "platform-tools" "platforms;android-29"
This will give you access to the adb and fastboot commands, which are great if you enjoy sideloading things onto Android and dabbling in the recovery options.
Install Android Studio
If you want to enjoy all the modern features, conveniences and UI elements of Android Studio, then it’s pretty simple. On the Android Studio download page, select “Download Android Studio,” and follow the instructions. During installation, however, there are a couple of things to consider.
The installer will offer to install an extra feature called Android Virtual Device, which creates an emulated environment to test various features and apps. (You’ll be asked again later whether you want to install this, so it doesn’t matter if you skip it here.)
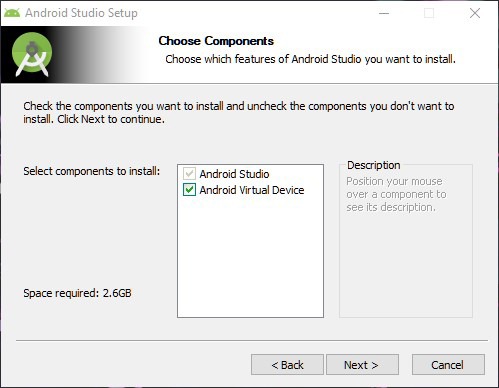
Once you do this and select an install directory, Android Studio will begin installing. It’s a big program so may take a while.
Once Android Studio is installed, open it. It will ask whether you want to import your existing Android Studio settings.
After that, click Next to follow the wizard, then “Custom” to install custom components. If you want to use Java with your Android Studio projects, go to your Java directory when prompted.
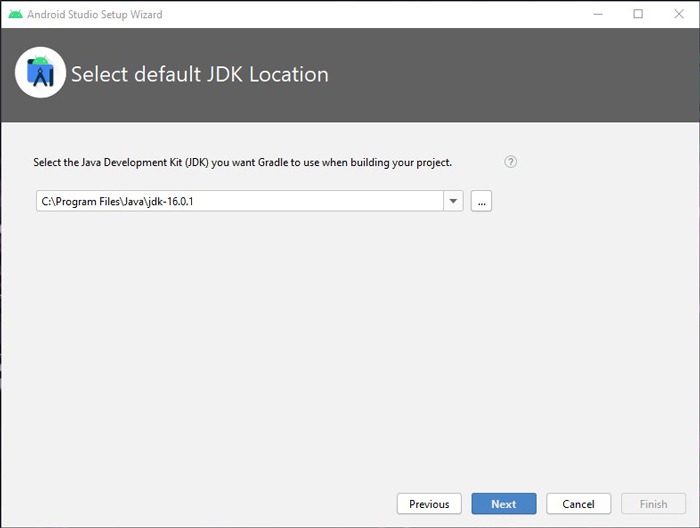
Select your theme, then pick any extra components you want to install. We recommend checking the “Performance” box to improve Android emulation based on your processor, and you can again pick Android Virtual Device if you think you’ll be using it.
Keep clicking Next, then Finish when you’re done.
Once Android Studio is fully installed, open it and you’re away. Click “Create New Project,” and feast your eyes on the great selection of templates.

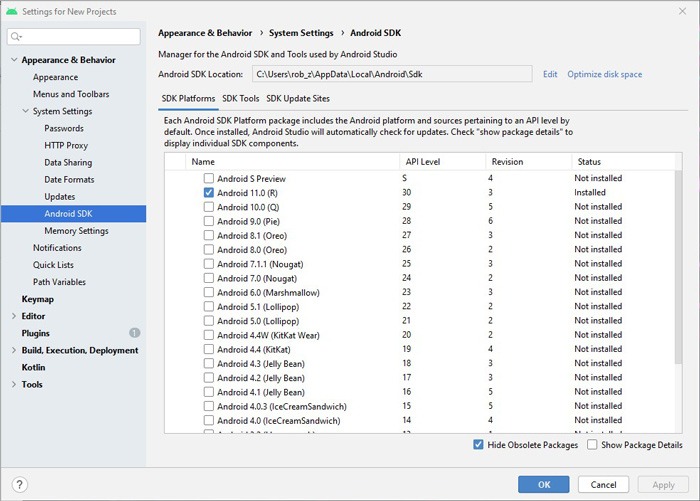
Or click Configure at the bottom-right corner of the main Android Studio screen to open the SDK Manager, Virtual Device Manager, and other things.
Those are the basics that should get you going with the Android Software Development Kit. If you’re not done messing around on Android, see our guide on creating your own Android widget, as well as our rundown of the best free music download apps for Android.



Comments are closed.