How to Create a Web App Bot In Microsoft Teams
One of the most powerful features of Microsoft Teams is the ability to create and connect bots. These bots allow conversational and transactional capabilities to easily create more complex tasks.
Beyond the actual coding of a bot to do useful tasks, implementing the infrastructure has been a challenge. This is because bots usually require a web service backing configured in a specific way, which silhouette studio business edition keygen makes quickly creating and testing a bot is more of a challenge.
Microsoft created a Web App Bot service that spins up all of the necessary infrastructures to allow you to quickly get started with developing a bot, testing, and ultimately publishing that bot to Teams. In this article, we explore how to quickly get started using the Echo bot template.
Creating a Web App Bot
The fastest way to create a new Web App Bot is to use the Microsoft Portal search ability to locate the Web App Bot in the Marketplace under the Bot Services service.

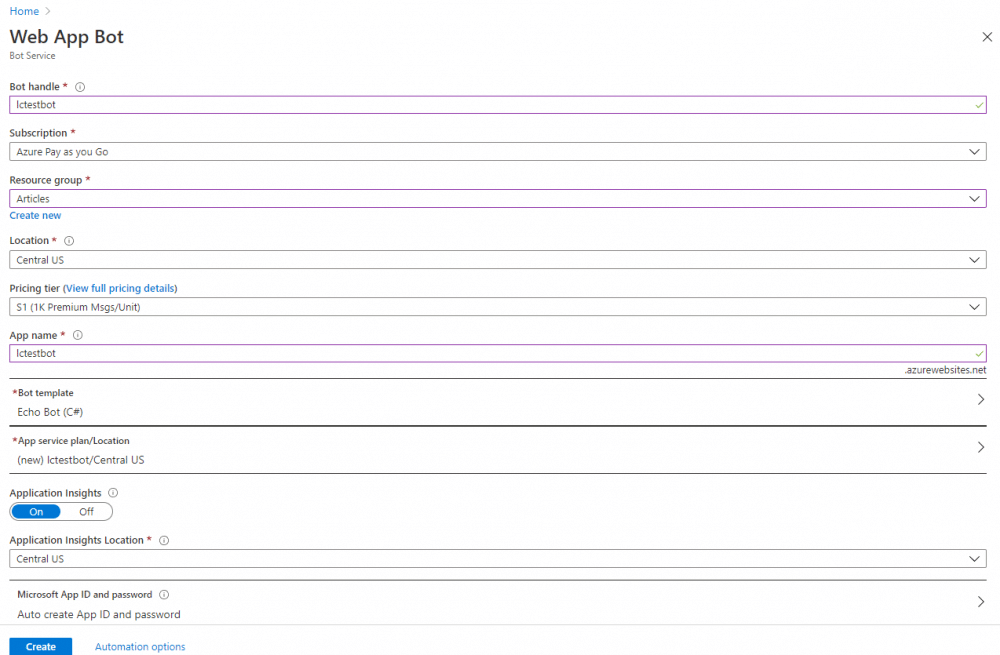
Once you have clicked on the Web App Bot, you are brought to a wizard to provision your bot and its necessary configurations.
- Bot Handle:
lctestbot- This is a unique handle that needs to be different than existing bots because it lives on
azurewebsites.net.
- This is a unique handle that needs to be different than existing bots because it lives on
- Subscription: {tenant subscription}
- Resource Group: {resource group for the bot}
- Location: {location to place the bot}
- Pricing Tier: $1 (1k Premium Msgs/Unit)
- There is also a 10k option as well.
- App Name:
lctestbot - Bot Template: Echo Bot (C#)
- App Service Plan/Location:
lctestbot/Central US- By default, you need to click on this to create a new location.
- Application Insights: On
- Application Insights Location: Central US
- This is recommended to be the same as where you locate the bot.
- Microsoft App ID and Password: Auto Create App ID and password
- This is recommended to let Azure manage this, unless you have a reason for using a specific app ID and password.
You will need to make sure you have two providers registered for your subscription: Microsoft.Storage and Microsoft.BotService. These are located under your Subscription → Resource Providers. You might find that the first time you load up Web App Bot it complains about not having the Microsoft.BotService registered. However, if you exit out and reenter, it will most likely work. This service automatically registers the first time you load it up and takes a moment.
Building a Web App Bot
Once the Web App Bot is created, you have access to the configuration pages for the bot. In this example, we are going to do a simple modification to the existing source code, rerun the build script, test, then test in a Teams client.
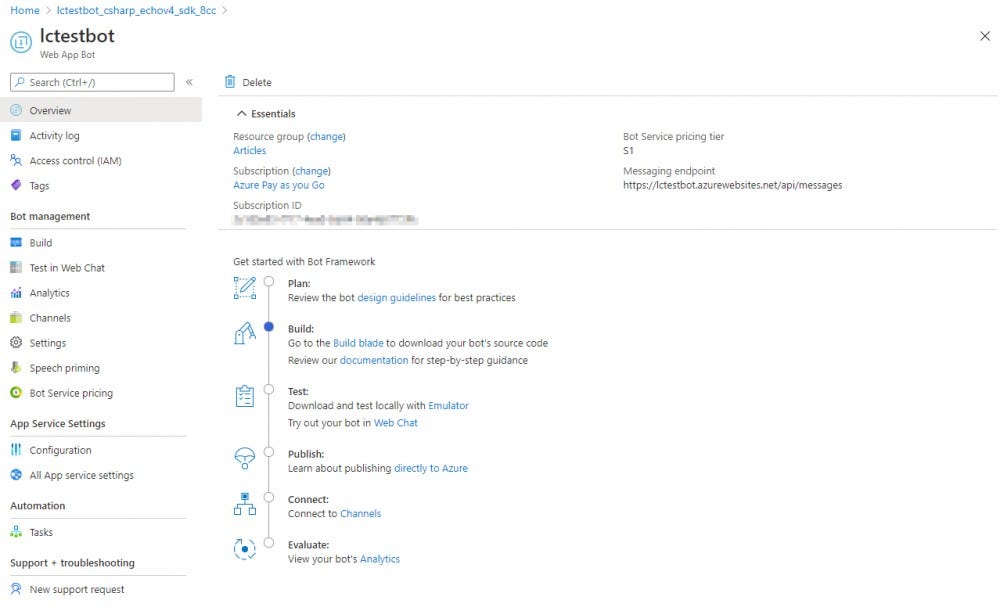
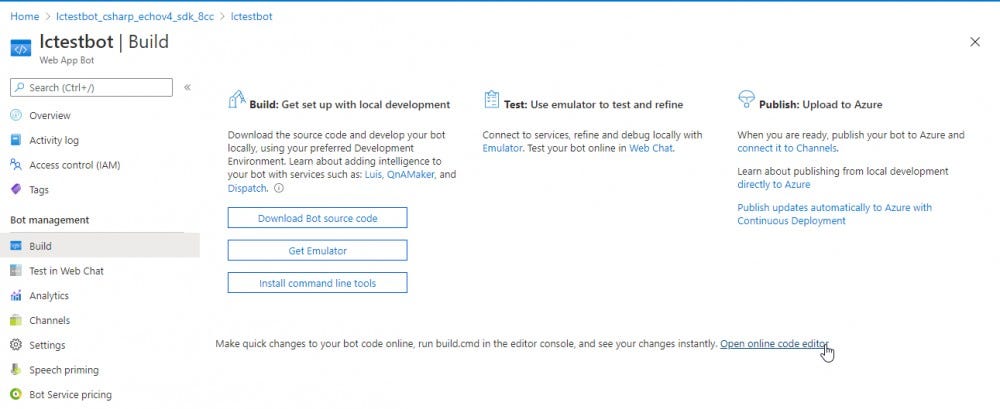
Navigate to the Build page, then locate the Open online code editor link. Clicking on this link opens the App Service Editor, making it easy to quickly modify the code and rerun the build script.
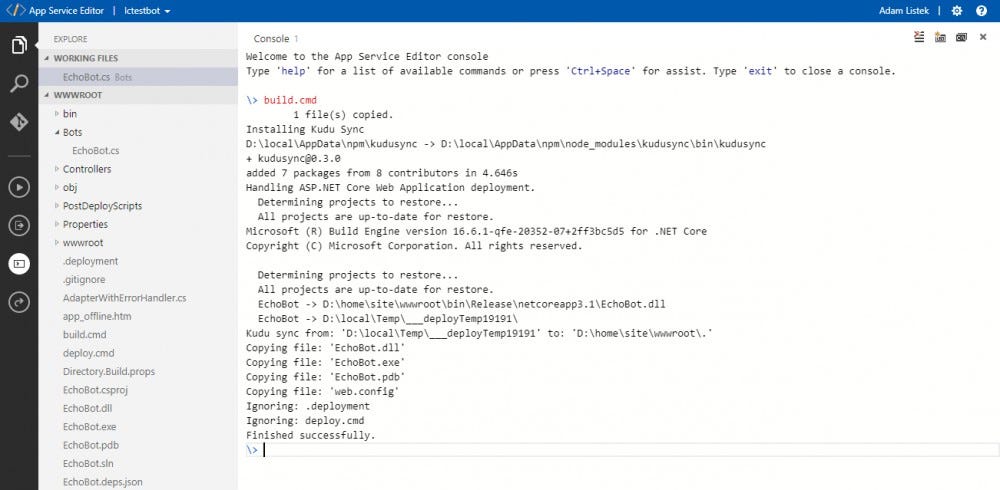
There is a lot of supporting code to make the bot work, but the core of the code is in the Bots folder. This contains the EchoBot.cs file, which we are going to modify. As you can see in the code below, we are going to add the Test text preceding the existing Echo text. By modifying the code, the file will be saved as you go and you do not need to manually save the changes.

Navigate to the Console, and enter in the build.cmd command. This will run a series of commands, recompile the code, and ultimately copy the compiled files to where they need to go to make the bot available. In the end, you should see a Finished successfully message indicating the compiled files are now available.
Testing the Web App Bot
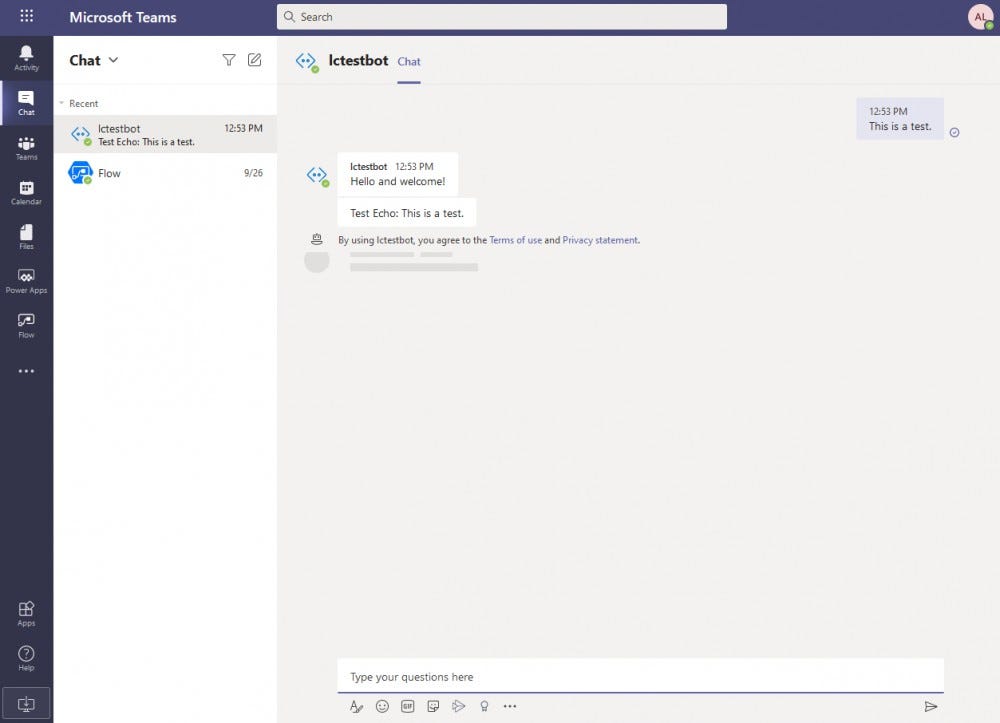
Thankfully, there is a Test in Web Chat feature built right into the Microsoft Portal Web App Bot services. This useful tool allows us to test how the bot reacts to conversational dialogue and simple commands. In this case, our bot simply echoes back the text. To make sure our change has taken effect, when sending in some text you should see the same text echoed back with the preceding text of Test Echo:.

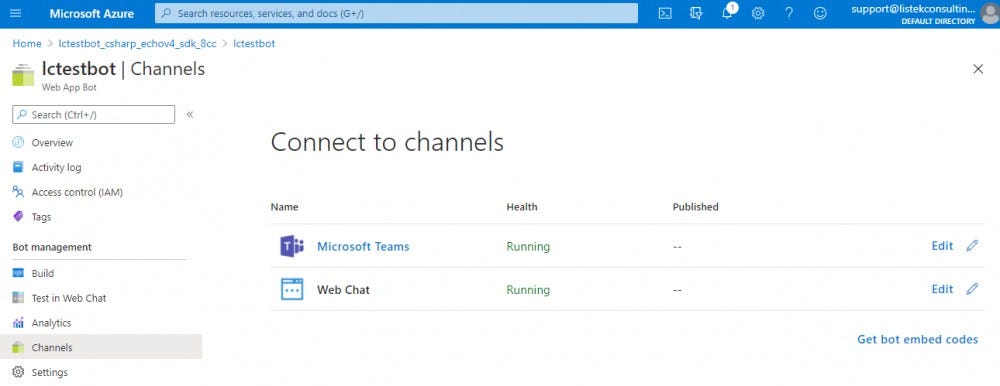
Next, we want to test this bot in an actual Teams client. By default, the only connected channel is the Web Chat. Click on the “Teams” icon to connect this bot to the Teams channel.

In this case, we are going to use all defaults, which is the Microsoft Teams Commercial messaging option, and all other options stay the same. Click “Save” to make this available to the Microsoft Teams channel.

To load up the bot into a Teams client, simply click on the Microsoft Teams link, and it will automatically load the bot into your Teams client.
As you can see below, the bot is available to the client, and we can test by sending a chat message and seeing that the result is as expected.
Conclusion
Microsoft Teams provides a powerful bot experience, but to ease development, take advantage of the Web App Bot service in Microsoft Azure. This lets you create a test bot that is easy to use and quick to develop, either from the online code editor or an offline editor such as VS Code. Start developing Microsoft Teams bots today!


Comments are closed.