How to Start a New Blog With WordPress
In this tutorial you’ll learn how to start a new blog with WordPress. In essence there are two routes you can take:
- Route 1: you can host your blog on wordpress.com. This is arguably the easiest way to go because it’s totally free, and you don’t have to be tech-savvy to get things going.
- Route 2: you can self-host your blog. This means paying for a domain and hosting, downloading the core files from wordpress.org, and knowing a little bit about working with WordPress and admin interfaces, but the benefits are that you are completely free to do as you please.
We’re going to walk through both routes so you can pick whichever you think is best for you.
1. Host Your New Blog on WordPress.com
The first route you can take to get your new blog started is to host it on wordpress.com. This is something a lot of people do when first starting out with WordPress because it’s easy and quick.

Set Up Your Blog
Start by visiting wordpress.com and clicking the large pink Start your website button.
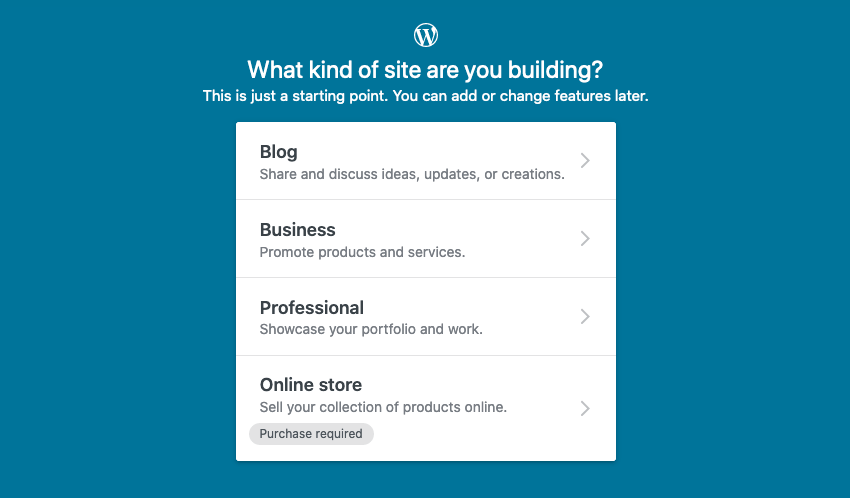
You’ll then be asked to sign up by entering your email address or creating an account with your existing Google or Apple login. With that done you’ll be asked what kind of site you want to create:

We’ll choose blog.
Select what kind of topic you’re involved with (dating, photography, food etc.) and then give your blog a name.
Give Your WordPress Blog an Address
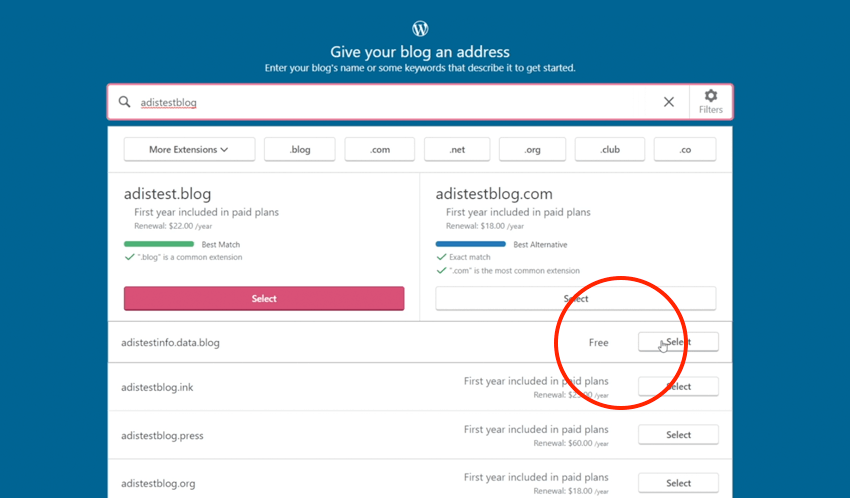
At this point you’ll be asked to select the URL (the web address) you want to use, by specifying a domain. You can use a domain that you already own, or you can purchase a domain with one of the wordpress.com plans. Lastly (as we’re doing here) you can use the domain which is offered for free. It might not be the most creative of domains, but it works just fine for our needs.

Your Blog Has Been Created!
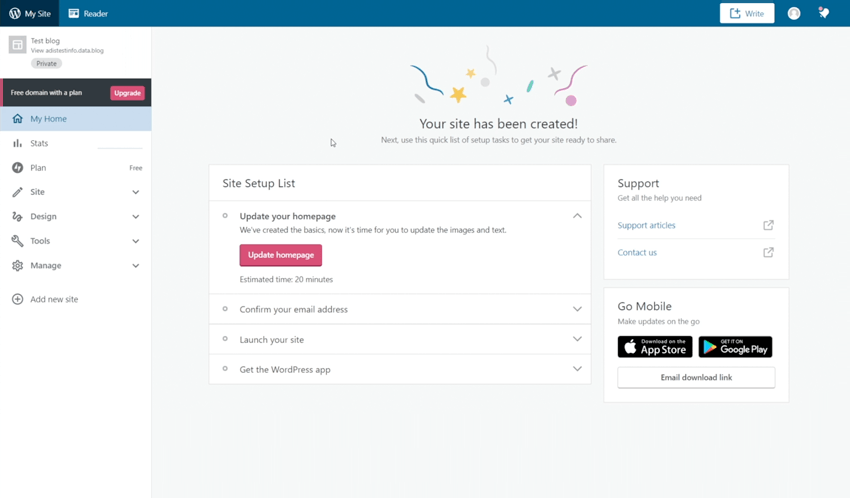
With that, your blog is ready for filling with content and you’ll be directed to the admin dashboard.

You can use the dashboard to add content to your site, and you’ll see on the left a selection of tools in the menu. Here, for example, you can add themes, though this is limited. You’re restricted to free themes with the free WordPress plan, or their premium themes with a paid plan; you cannot purchase or develop your own themes to use with wordpress.com unless you opt for the Business plan.
Use of WordPress plugins is similarly restricted. You cannot load your own plugins with the free version, but wordpress.com would say it’s unnecessary anyway as you have a huge array of functionality available to you from within the platform.
Via the sidebar menu you can also change settings, and customize your site. The customizer and the way these options work are actually very similar to what you’d experience hosting your own WordPress blog, and we’ll look at that route next.
2. Self-Hosting Your WordPress Blog
How do you self-host a WordPress blog? With this option you basically need two things to get started:
- A domain (a web address to locate your blog)
- Hosting (the servers where you’ll keep your files and database)
Choosing a Hosting Provider
The hosting provider you choose will influence how easy or complicated it is to set up your WordPress blog. All WordPress hosts offer direct server access so that you can visit wordpress.org, download the WordPress files yourself, then install them manually.
Better still, most reputable hosts will offer some kind of “one-click WordPress installation” to automate the process for you.
SiteGround is one such example, and their Managed WordPress Hosting packages include an automated installer, and “WordPress Starter” to get you up and running with no fuss.
If you want to learn how to setup a WordPress blog yourself, this hosting option is a great way to start. SiteGround is one of the few options endorsed on the WordPress website. I personally use it too, and definitely recommend it.
Start a New WordPress Blog With SiteGround
I’ll quickly demonstrate how to setup a WordPress website with the hosting platform I use. Begin by logging in and entering the dashboard. There, click on Websites, and add a new website.
Here you can see the domain selection options, where in this case I’ll choose New Domain.

The setup steps are very similar to what we covered with wordpress.com, walking you through the process in a logical fashion. You can even have WooCommerce installed and setup during this process too.

Conclusion
Once you’ve setup your WordPress installation, irrespective of the route you took, the next step is adding your content and customizing your blog.
As we discussed before, hosting your own WordPress blog gives you complete freedom to choose themes and plugins, without paying additional monthly fees. So for a more complete experience I recommend you go with this option.
If your needs are simpler and the amount of freedom you’re looking for is less extensive, I would opt for starting your WordPress blog on wordpress.com.


Comments are closed.