How to Enable Full Disk Encryption in Windows 10
On our personal computer, we generally store lots of important data. We generally think that having a password-protected user account might save our computer from unauthorized access. However, it’s not entirely true. Encryption is not just about stopping the unauthorized access, its also about protecting your data in case you ever lose your PC.
So, full disk encryption becomes important, especially if you have lots of sensitive data stored on your hard drive. Full-disk encryption ensures that the data stored on the hard drive is completely inaccessible until and unless the correct password is entered.
Without full disk encryption, its absolutely possible for an attacker to remove the hard drive from your computer, mount it to another computer, and access all your files. So, everyone who wants to keep their files secure and safe from unauthorized access needs to use the full disk encryption.
How to Enable Full Disk Encryption in Windows 10
In this article, we are going to share some of the best methods to enable full disk encryption in Windows 10. So, let’s check out how to enable full disk encryption in Windows 10 computer 2019.
Step 1. First of all, go to start or press the windows button and then type “BitLocker” and press enter.

Step 2. Now you will be inside Manage Bitlocker option there, and you will now get the encryption options there.
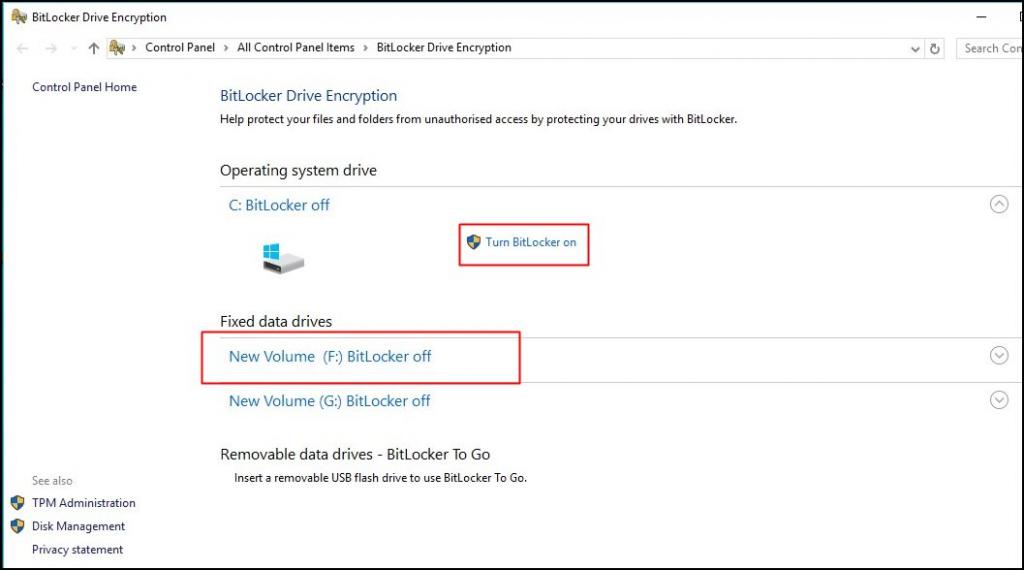
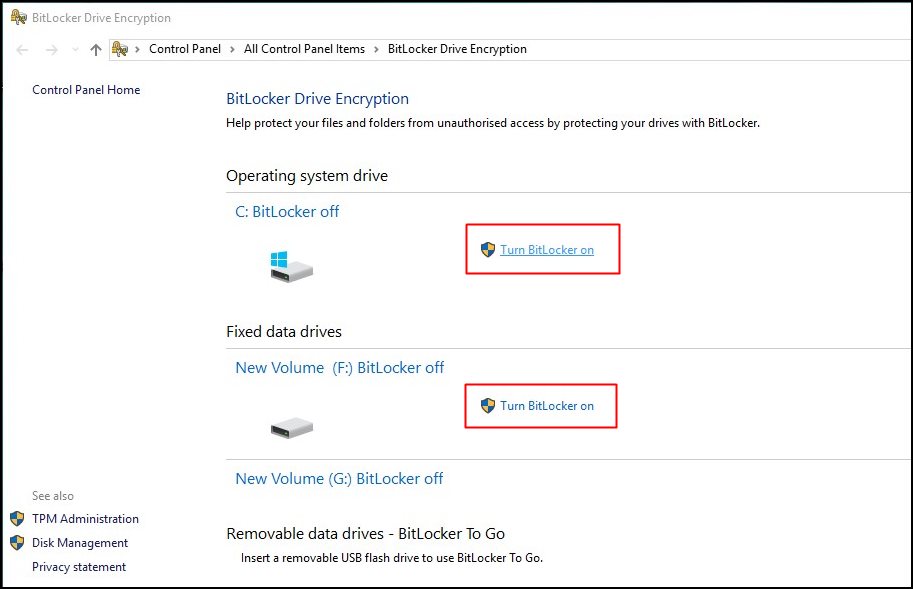
Step 3. Firstly starting from C drive where windows are being installed and all your user data is saved, you can encrypt that drive by clicking on Turn on BitLocker. You can also select any other drive to encrypt first as per your wish.
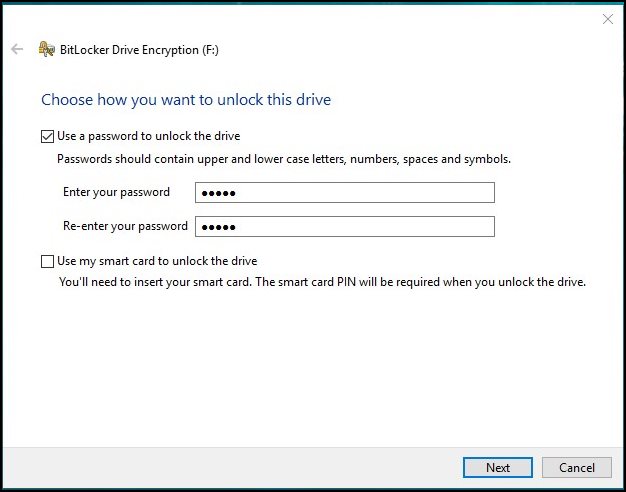
Step 4. Now you have to select the method to encrypt the drive that is either using the password or using the smart card. We recommend going for password encryption. Enter any of password and again confirm it.
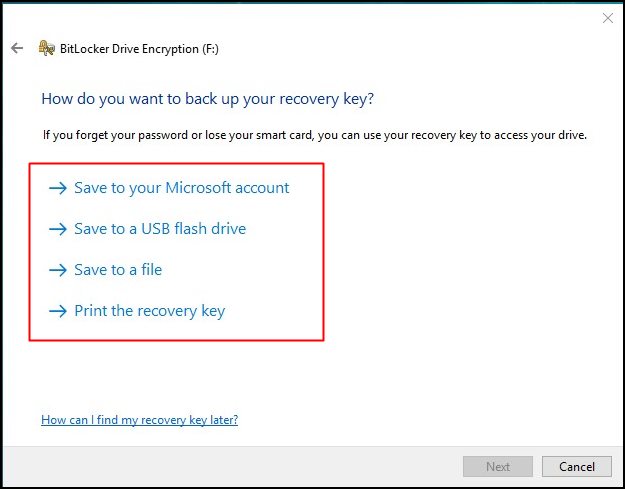
Step 5. Now choose any of the ways where you want to save the password you entered. And then complete drive encryption at next step.
Step 6. Now in the very next step, you need to select “New Encryption mode” and then click Next. Now the encryption process will start and it will take up to hours and after that process will complete after some time.
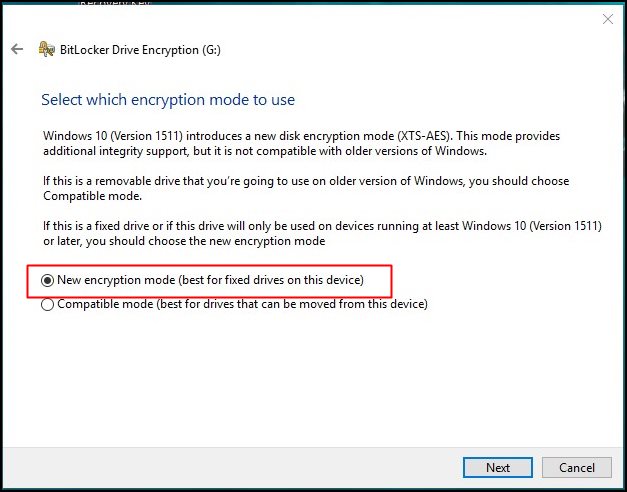
That’s it, your device will be now get encrypted with the password that you have set and also you can repeat the same thing with all other drives and that can too get encrypted and your data will get secured from any illegal access.
Other Options
Bitlocker is present on Windows 10 professional edition and users using the other version of Windows 10 need to pay $99 to upgrade to the Windows 10 Pro. So, if you don’t want to spend an extra $99 for full-disk encryption, then you can consider these options.
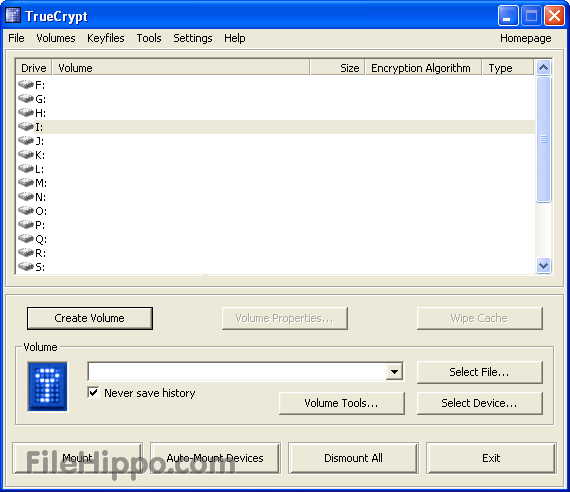
There are plenty of encryption software available out there like VeraCrypt, TrueCrypt, etc. These tools can encrypt the GPT System partitions at ease. TrueCrypt used to be the best one in this section, but it’s no longer being developed.
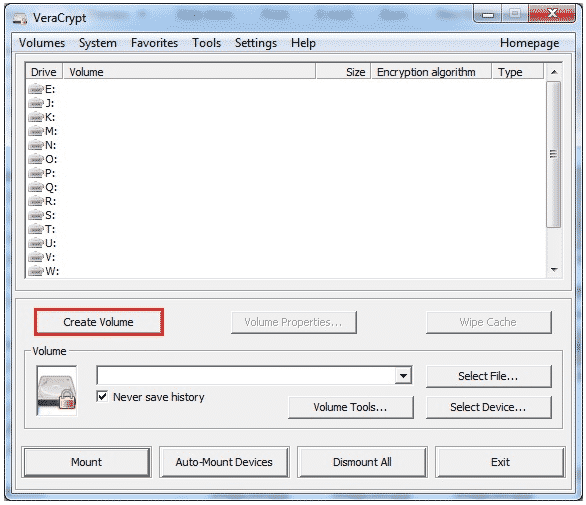
If we talk about the VeraCrypt, it’s an open-source full-disk encryption tool that is based on the source code of TrueCrypt. It supports both EFI and GPT system partition encryptions.
So above is all about How to Enable Full Disk Encryption in Windows 10. With this, you can easily secure the private data that you have stored in the disk drives of your Windows by encrypting them with bit locker. Hope you like this, do share with others too, Leave a comment below if you have any related queries with this.


