How to Remove Background Noise from Audio on macOS
Hum, buzz, hiss, or whirr: noise kills good audio. If there’s a distracting noise in the background of your take, you’ll drive away listeners in droves. People just will not listen to poor audio. But noise reduction algorithms can be a savior. Learn how to remove background noise from audio on macOS with Audacity and Logic Pro X’s built-in tools.
Remove Background Noise on macOS with Audacity
Audacity is a free, open-source cross-platform audio editor. Its noise-removal tools are effective, if blunt.
1. Make a selection that contains only the noise you wish to remove. If you have a few seconds of room tone at the beginning or end of your tape, this is a perfect use for it.

2. Open “Effect -> Noise Reduction” from the menu bar.
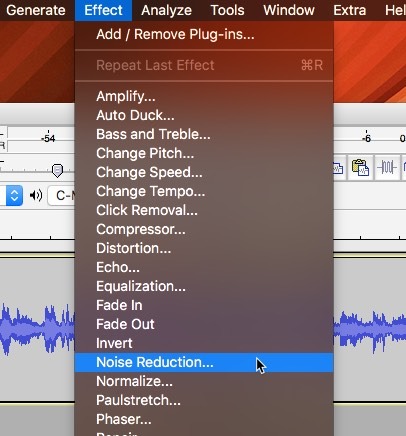
3. Click “Get Noise Profile,” which closes the window. When you click this button, Audacity builds a noise profile based on your previous selection. Audacity will mathematically analyze the selected noise so it can detect and remove similar noises later.
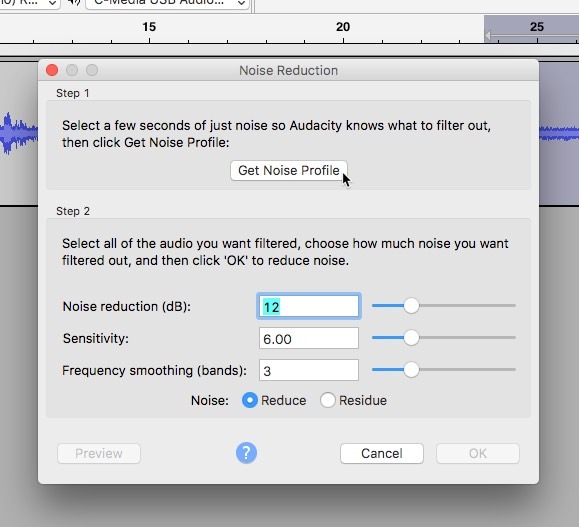
4. Select the region of the track you want to remove the noise from. If the noise runs through your whole track, for example, select the whole track at this step.

5. Open “Effect -> Noise Reduction” from the menu bar again.

Noise Reduction Settings
6. Choose the decibel level by which you want to reduce the sound. Audacity will edit the waveform to reduce sounds that match your noise sample by the chosen amount. The greater the decrease, the more obvious the effect will sound.
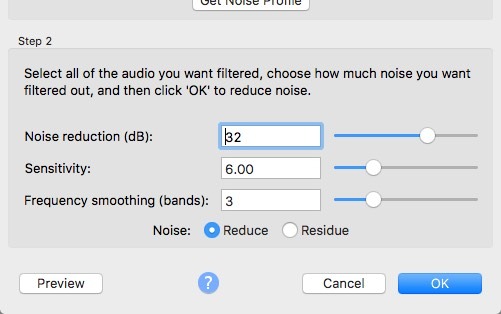
- “Sensitivity” controls how similar the audio must be to the sample to be considered noise. The smaller the number, the more selective the removal algorithm will be. At higher numbers (to a maximum of 24), more noise will be removed, but at the expense of likely removal of “good” signal as well.
- “Frequency Smoothing” spreads the noise reduction across neighboring frequency bands. This may muddy your audio, but it can also hide the noise reduction’s effects more thoroughly.
7. Click “Preview” to hear a short segment of audio processed with your current settings. Smart editors preview before applying: they know that noise removal is a destructive operation. It will result in permanent changes to your waveform once applied.

- “Reduce” plays back the audio as it will sound after the noise is removed.
- “Residue” plays back only the audio that will be removed. If you hear recognizable portions of “good” audio in the residue, you’ll want to adjust your settings before committing.
8. Click “OK” to instantly apply your settings destructively.

Remove Background Noise on macOS with Logic Pro X
Logic Pro X is the Apple version of a digital audio workstation. It’s not the most popular of the DAWs out there, but it’s well equipped and intuitive for Apple users. It doesn’t have a built-in noise reduction plugin, though commercial options are available. We can use an expander and an EQ to make our own.
Add an expander to your track with the noisy file.
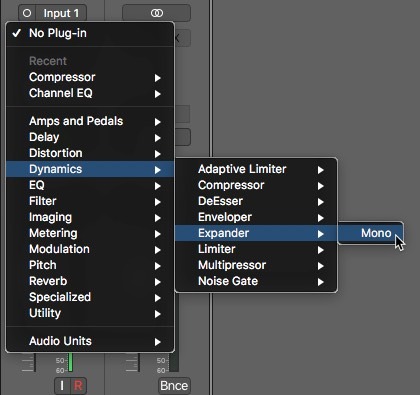
The expander makes loud noises louder and quieter noises quieter. It “pushes” audio out from a user-defined “middle.” We can then remove just the bottom part of the signal, the noisy part, using an equalizer or a noise gate. If you’re not sure where to start when adjusting the noise gate, the “High Expansion” preset is a good starting point.
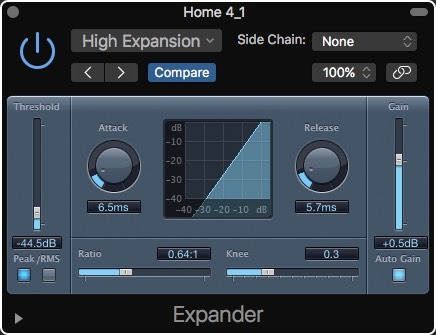
Click the “EQ” box to turn on a Channel EQ.
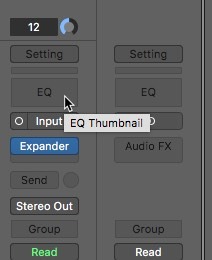
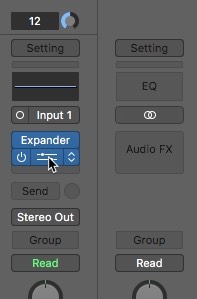
Click the settings slider to open the effect.
Play back your track and selectively reduce audio frequencies to reduce the audible noise. For a good start, roll off everything under 100Hz and above 16KHz.
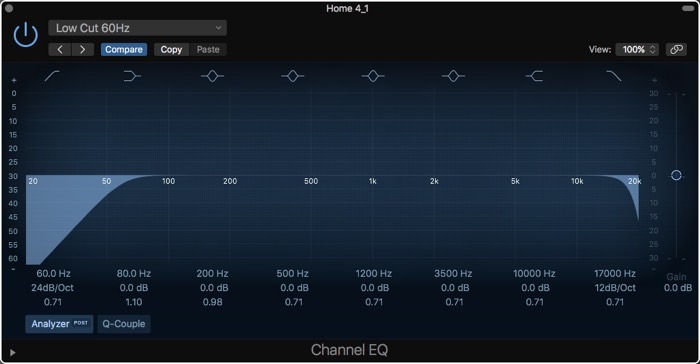
You can apply the EQ part of this technique in Garage Band as well and employ a Noise Gate in place of an Expander.
Conclusion
With commercial plugins, Logic Pro X can be the most powerful noise reduction tool on a Mac. But with the default settings, we’re limited to only built-in global effects. Audacity’s open-source noise reduction algorithm is effective but can be heavy-handed, sometimes clobbering audio far too aggressively. Of course, dedicated commercial noise reduction plugins for a DAW like Logic Pro X will always be the most effective way to reduce noise.


