Top 8 Microsoft Calendar Tips and Tricks for Power Users
Microsoft Calendar is a popular app, especially among Outlook users who utilize it to boost their productivity by scheduling meetings, set deadlines, and other things. As part of its recent overhaul, Calendar has become more powerful and easier to use than ever before. Let’s take a look at some cool Microsoft Calendar tips and tricks for the power users.

Even if you are just starting out, you will find this guide useful.
Let’s begin.
1. Keyboard Shortcuts
Here are some nifty keyboard shortcuts for desktop Calendar app. Try them out:
- Press Ctrl+2 to switch to Calendar from mail view on desktop
- Press Ctrl+G to open Go To Date dialogue
- Press Alt+= to go to month view
- Press Alt+- to go to week view
- Press Ctrl+Alt+2 to go to Work Week view
- Press Ctrl+E for quick search
- Press Alt+H+I to create a new item
- Press Alt+D to open daily view
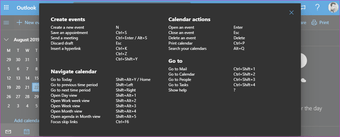
Here is the entire list. Please bookmark it because it’s a rather long list. If you are using the web version or Outlook.com, simply press Shift+? to view all the available shortcuts.
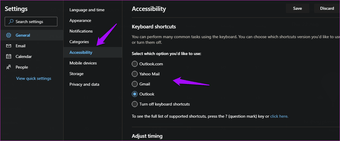
Here is a neat trick that a few people know. If you are coming to Microsoft Calendar from Gmail or Yahoo Mail, you can use the same keyboard shortcuts that you used there. Open Settings and find Accessibility under the Calendar option. Choose your preferred email provider there.
2. Print It
There are two ways to use this feature to maximum effect. The first way is to print a blank calendar which you can then pin to your notice or bulletin board. You can now use it fill important dates which will be visible even when you are offline. A lot of people still like the old way paper and marker.
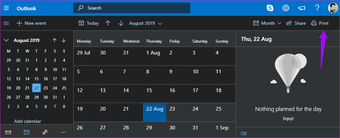
The second way is to print an already filled in calendar. Again, useful if you are using the bulletin board for visual representation.
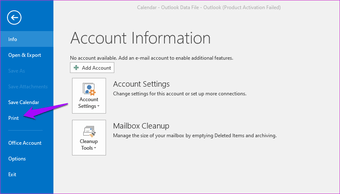
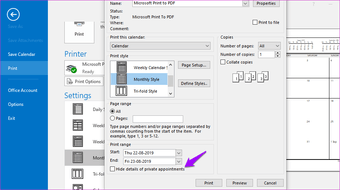
In the web view, there is a dedicated Print button on the right. In the desktop version, you will find the option under the File tab. Notably, there is an option to Hide details of private appointments visible just before giving the print command, in case you don’t want others snooping around.
6. Color Codes
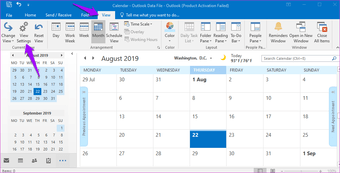
Click on View Settings under the View tab.
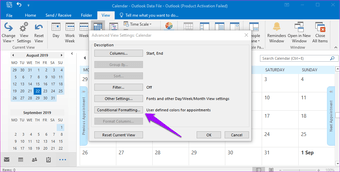
Click on Conditional Formatting.
That’s where you can create new rules on how Calendar events will be marked in different colors and when.
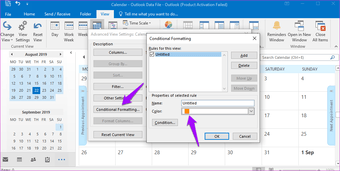
Rules for calendar and emails will be different but are accessible from the same menu. So, don’t get confused between the two and name them accordingly.
7. Group Calendars
Microsoft Calendar allows you to work with multiple calendars, which is really cool. You can create one for your work, one for home, and maybe a shared calendar. You can easily group these calendars to avoid confusion.
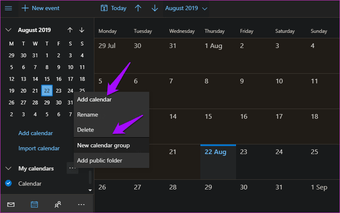
In the web version of Calendar, click on the menu icon next to My calendars to create new calendars or group already created calendars. You can then move a calendar to different groups through the same menu.
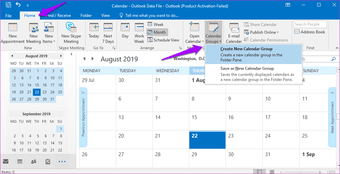
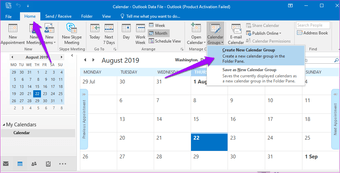
In the desktop version, click on calendar Groups under the Home tab to create one.
8. Email Events
Flying somewhere? Want to stay updated about flight status? Allow Calendar to scan your inbox to collect the necessary information. In the web version, open Settings and select Events from calendar under Calendar option. As you can see, the calendar will also scan for other events like reservations, rental cars, and more to keep you updated.
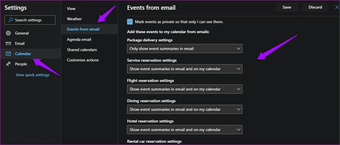
In the desktop version, you will have to visit Outlook.com and sign in using your Office 365 account to make the changes.
Take Control
Whether you are using Microsoft Calendar as part of Office 365 suite or using the free version on the web, these tips will help you be more productive. Did we miss something? Know more tricks? Share your tips and tricks in the comments below.


