How to Use the New Screen Capture Interface in macOS Mojave
In macOS Mojave, Apple has introduced a new screen capture interface that makes taking screenshots and screen recordings on your Mac easier than it used to be.
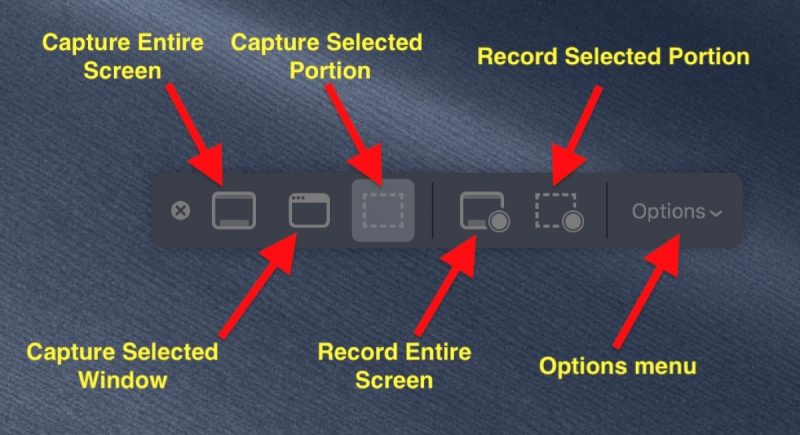
A new floating palette brings the traditional Mac screen capture functions together under a single menu. You can access it by hitting Command-Shift-5. Let’s take a closer look at what’s on offer.

The three buttons to the left of the first menu divider provide you with options to take a screenshot of the entire screen, a selected window, or a selected portion of the screen. Note that the keyboard shortcuts for these actions still function as before in macOS.
Meanwhile, on the right of the palette’s first divider are two buttons to begin a screen recording – taking in the whole screen or just a portion of the action. These actions were previously only accessible in the macOS Grab utility.

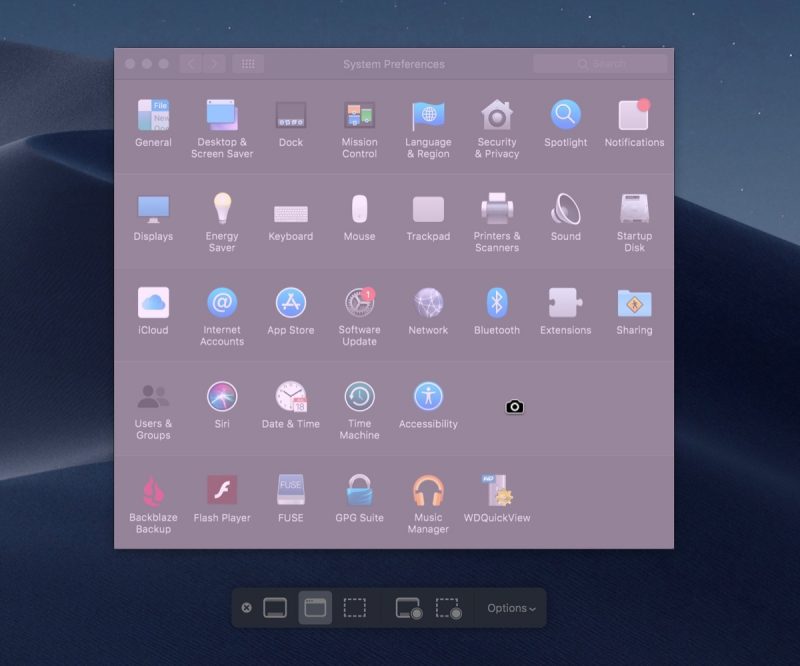
If you choose to capture a window, hover your mouse cursor over it: The window will be highlighted and your cursor will change to a camera. Simply click your mouse button to take the capture.
If you’re capturing a selected portion of the screen, use the mouse cursor crosshairs to select the area you want to capture. When you take a screen recording, a button will appear in the menu bar for you to click when you’re ready to end the recording.
You can click the rightmost button on the palette to reveal an additional menu of options for controlling other variables, like where you want your captures to be saved (Desktop, Documents, Clipboard, and so on) and whether to include a 5 or 10-second delay before the capture takes place, giving you time to get your screen in order.
 As you’d expect, unchecking the Show Mouse Pointer option ensures the mouse cursor doesn’t appear in your capture. The Show Floating Thumbnail option takes a little more explaining.
When you take a screenshot or screen recording in Mojave, a floating thumbnail appears in the bottom corner of the screen, just like it does when you take a screenshot on an iOS device running iOS 11 or later.
Clicking on the thumbnail opens the capture in a window, which includes image Markup tools, or a clip trimming option in the case of recordings, as well as options to share the image/recording or delete it if it didn’t turn out like you wanted.
If you’re taking multiple screenshots in sequence, you probably won’t want the floating thumbnail showing up in subsequent captures, which is why the option to turn it off exists.
For additional tips on controlling the behavior of screenshots using keyboard shortcuts, click here.
Discuss this article in our forums


